
.png)
A Practical Example of ASP.NET MVC
So now that you know how ASP.NET MVC works and how it easily helps us build high quality web applications by dividing the workflow into 3 separate components, we can now work on a practical example to let you see it in action.
Well, you know what I will tell you next if you have been following my boring yet informative blogs. That’s right! Time to list what tools you will need on your development system to start developing our example web portal. So make sure you have the following tools and software installed and ready to use:
Introduce cultural tidbits or information in each meeting, or facilitate a discussion on positive globally trending news topics
ASP.NET MVC 5 (May already be installed in with Visual Studio 2013).
SQL Server 2012.
Note: You can develop an ASP.NET MVC Web Application using older versions of Visual Studio (2010/2012) and SQL Server (2005/2008) too. You will have to install the required ASP.NET MVC version if it’s not found on your Visual Studio new projects list.
To learn about NuGet and how to install and use it you can visit my first blog of this series.
Ok now that you have everything you need to start development in ASP.NET MVC, let’s Rock ‘n’ Roll Baby!
I will be demonstrating a simple site (same as the one I demonstrated in my previous ASP.NET Web Forms blog). This site will list the latest movies released and also provide ways to add, edit and delete the listings to manage that list of movies.
In your Visual Studio 2013:
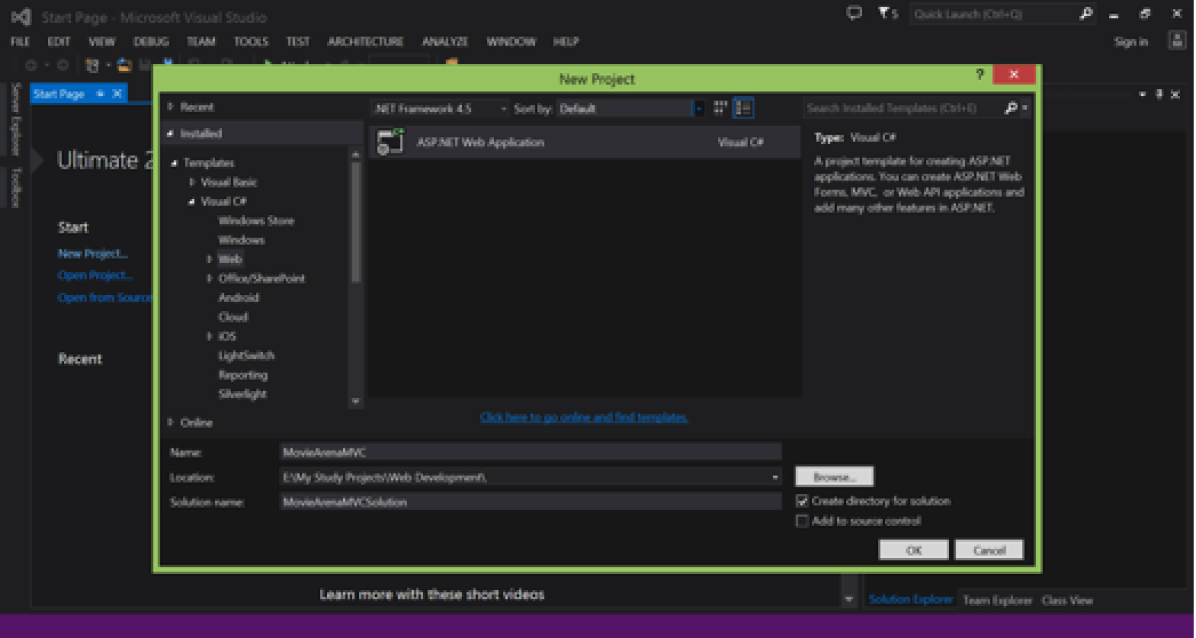
Go to File -> New -> and click Projects. Then select Visual C# on the left, then Web and then select ASP.NET Web Application.
Note: You can select Visual Basic if you are comfortable with it but in this example I will be using C#.
Rename the project to “MovieArenaMVC” and the solution name to “MovieArenaMVCSolution” and then click OK.
In the next dialogue box, you can now select the technologies (single or combination) that you will be using in your web application. In our case we will select MVC.
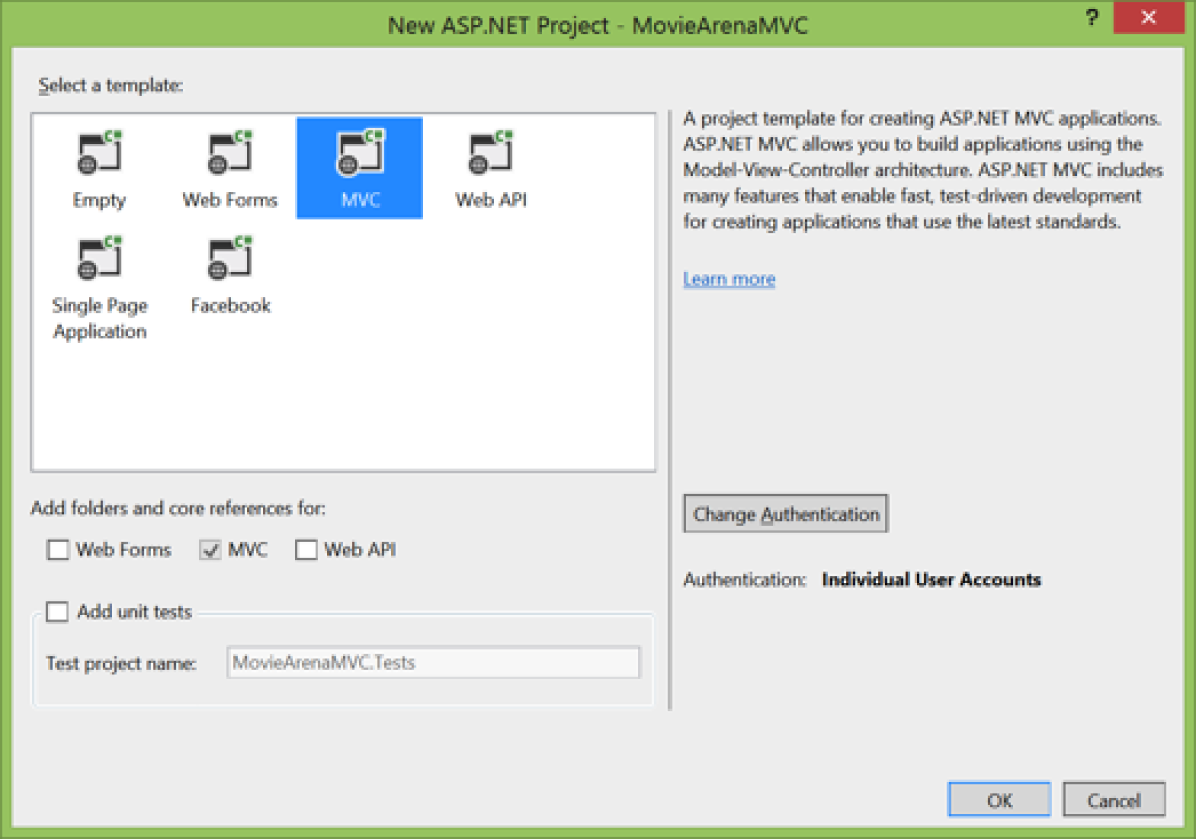
As you can see, Visual Studio 2013 now gives you the option to add a unit test project for your web application, and you can change the authentication type that your web application will use. We will further explore Visual Studio 2013 features and upgrades in a future blog, but for now feel free to research more about the new additions and changes in Visual Studio 2013. Okay! So let’s move on without the unit test project or changing the authentication, as we will keep it to Individual. Click OK.
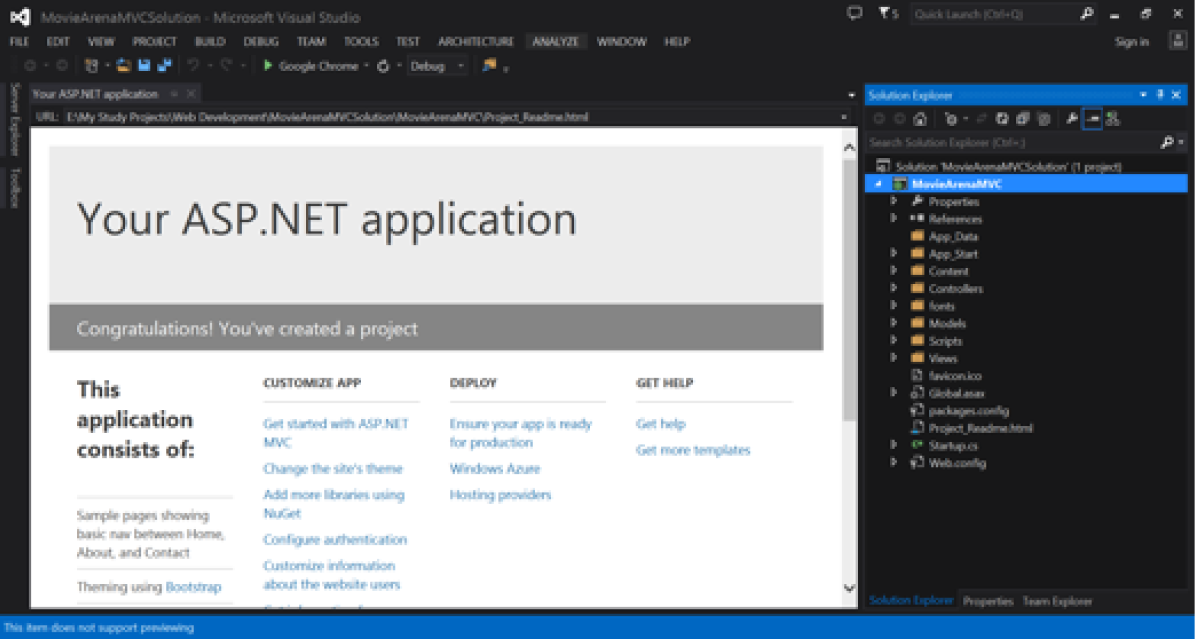
You can now see in your solution’s explorer that Visual Studio added all that was necessary for you to start developing your MVC application using a default template. This is a good place to start.
Before we move on, let’s build, debug and run our web application to see what the default template in Visual Studio has already added in our web application that we will be customizing to our needs.
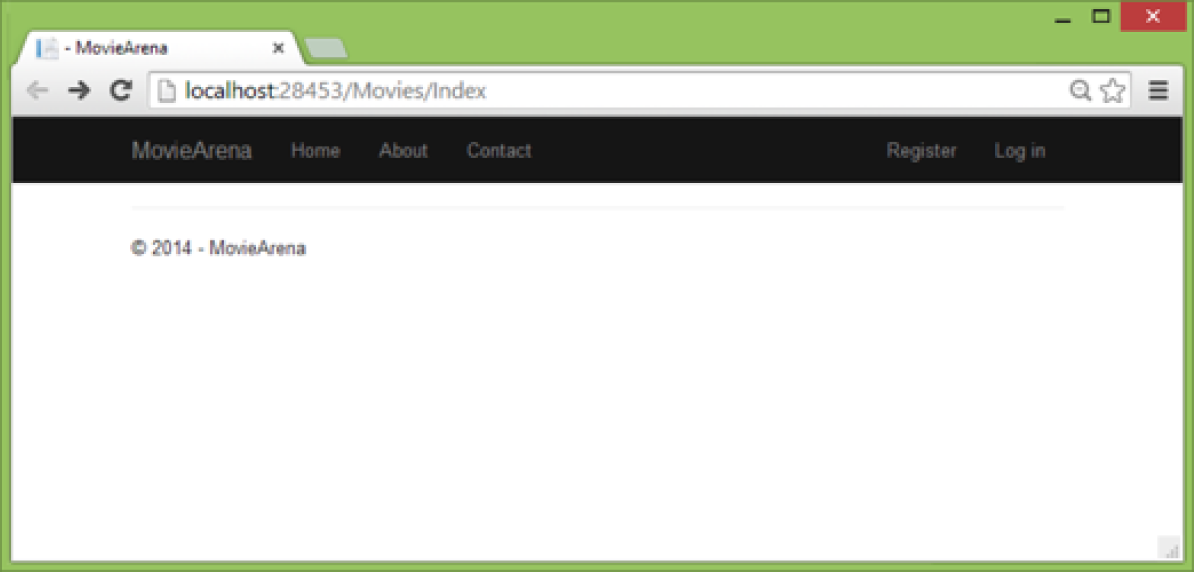
In the Build File Menu on the top, click the Build Solution option. Once the web application is successfully built, we can start debugging it by going to the Debug File Menu and clicking Start Debugging or for a shortcut, hit F5. This causes Visual Studio to start IIS Express and run your web app. Visual Studio then launches a browser and opens the application’s home page like displayed below.
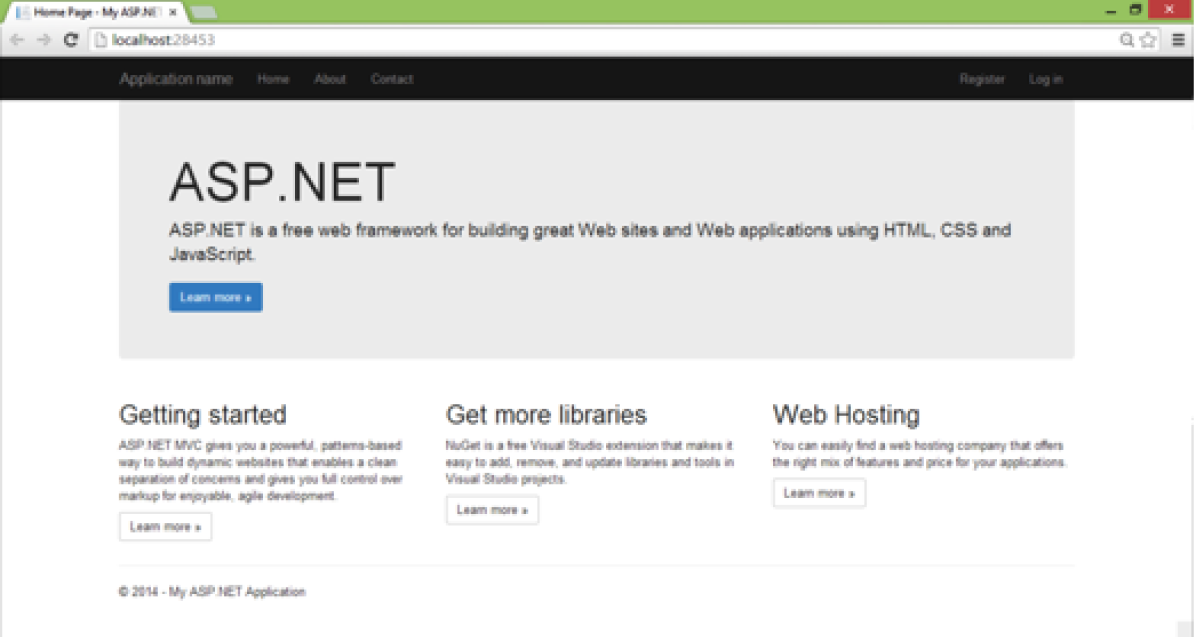
Right out of the box this default template gives you Home, Contact and About pages as well as authentication pages like the register and log in pages. The next step is to change how this application works and learn a little bit about ASP.NET MVC. Close the ASP.NET MVC application and let’s change some code.
Let’s begin by creating a controller class. In Solution Explorer, right-click the Controllers folder and click Add, then select Controller.

In the Add Scaffold dialog box, click MVC 5 Controller – Empty, and then click Add.
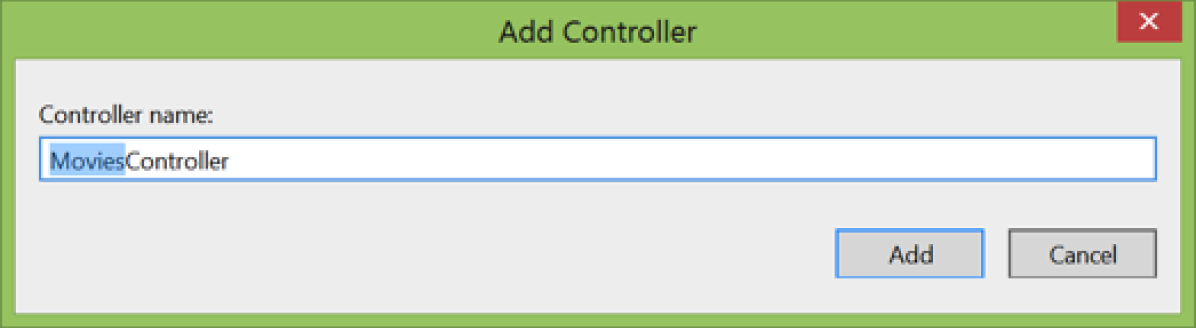
Name your new controller “MoviesController” and click Add.
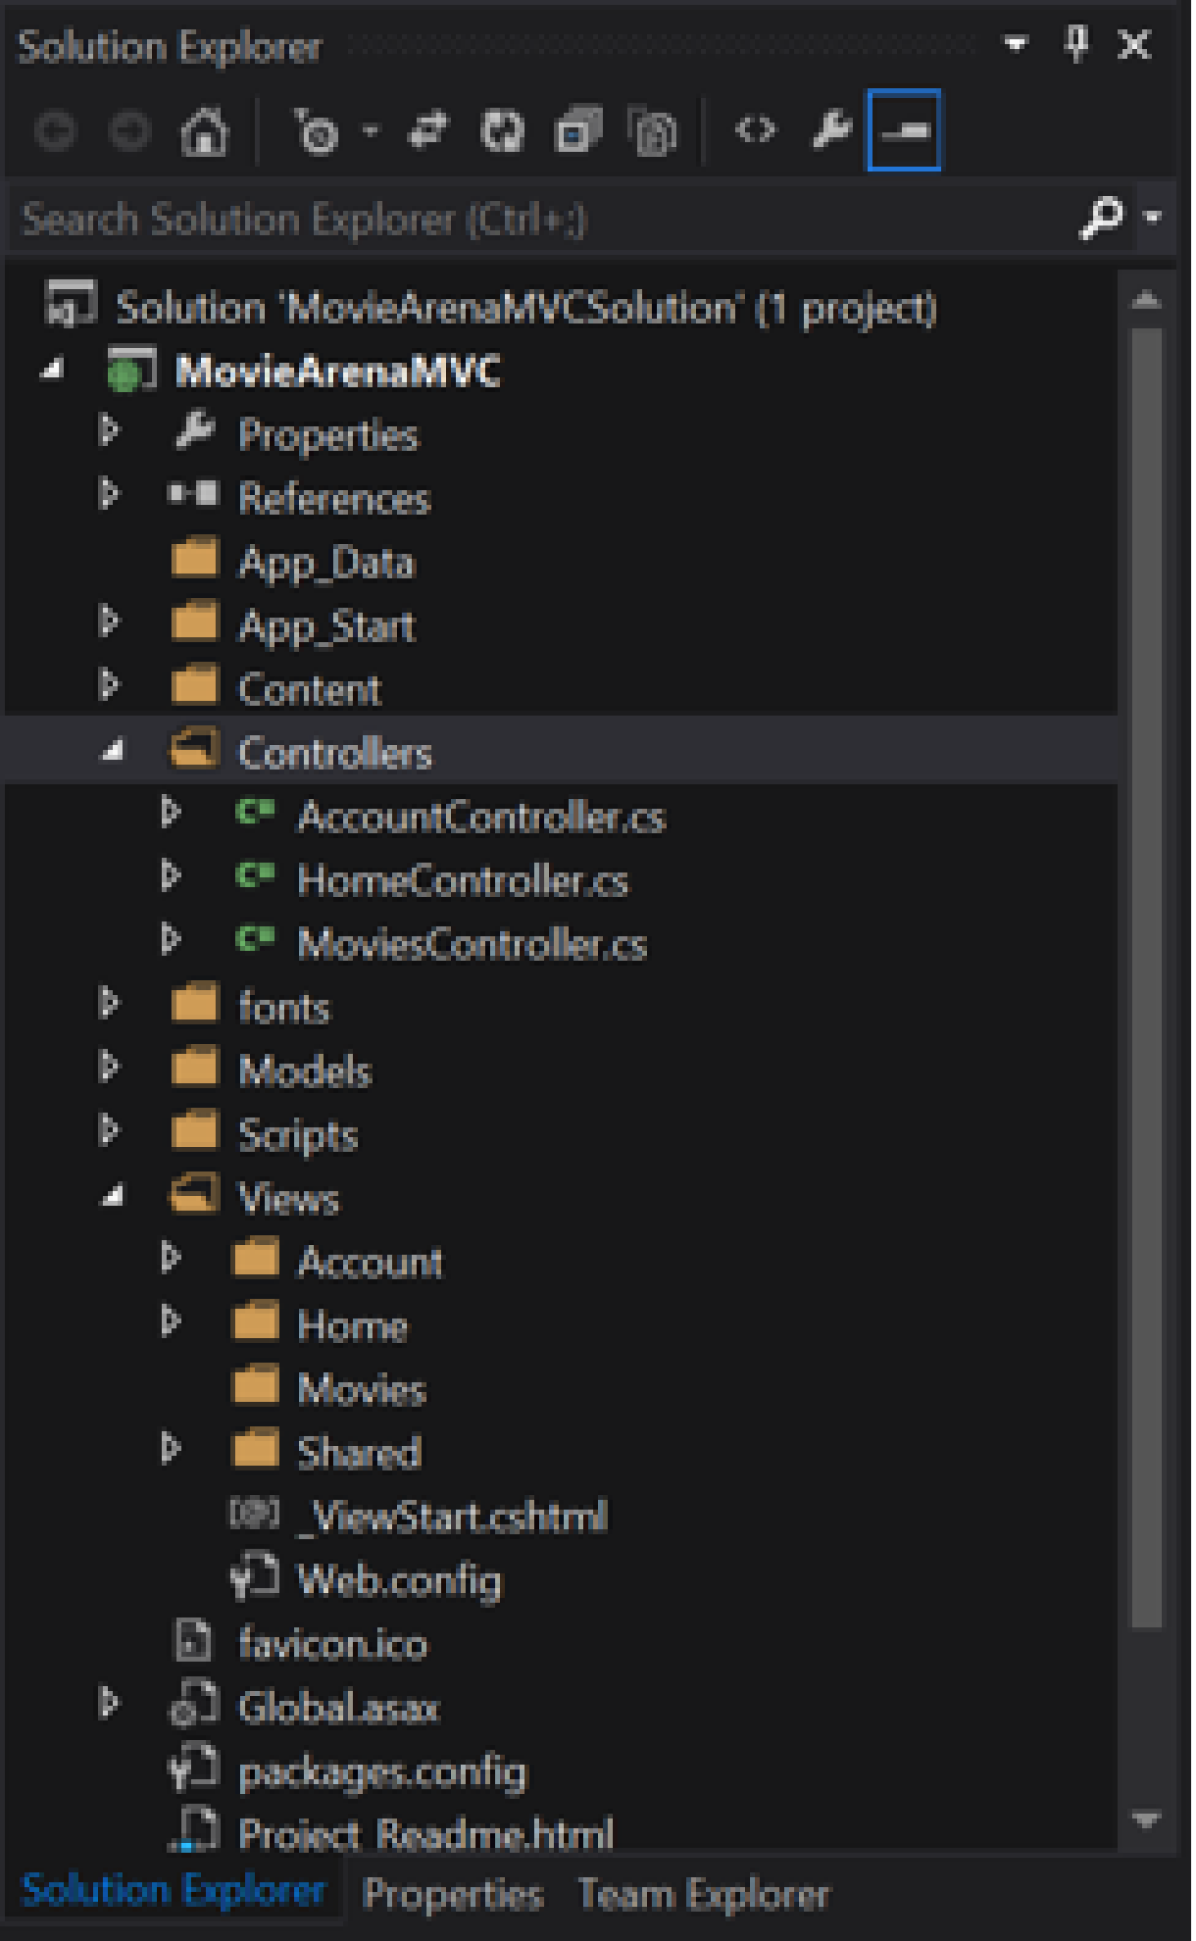
Notice in Solution Explorer that a new file named MoviesController.cs and a new folder ViewsMovies have been created. The controller is open in the IDE.
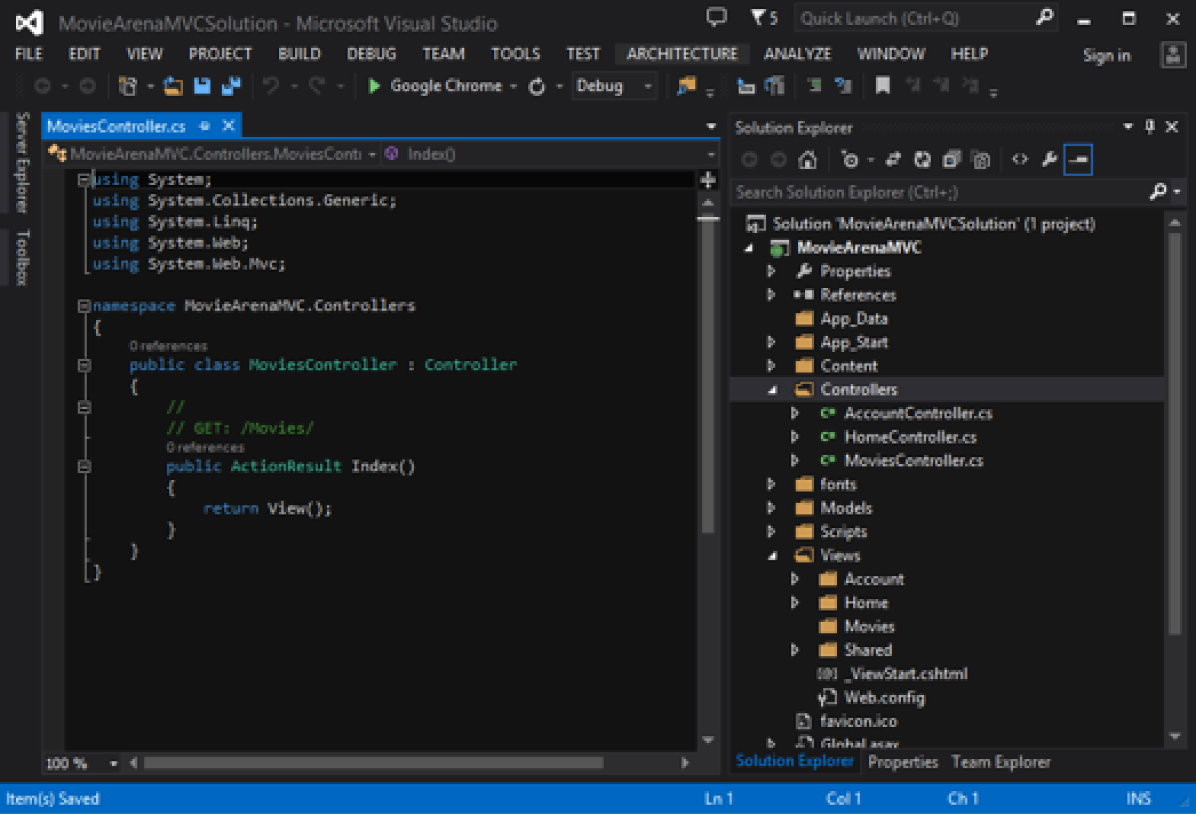
The Index method in the controller uses a view template to generate an HTML response to the browser. Controller methods, like the Index method above, generally return an ActionResult (or a class derived from ActionResult).
To return a view we will be creating a view template file using the Razor view engine.
Before we move on to adding our view, I would like to mention the routing structure of ASP.NET MVC briefly.
ASP.NET MVC invokes different controller classes (and different action methods within them) depending on the incoming URL. The default URL routing logic used by ASP.NET MVC uses a format like this to determine what code to invoke:
/[Controller]/[ActionName]/[Parameters]
You set the format for routing in the App_Start/RouteConfig.cs file in the following method.
public static void RegisterRoutes(RouteCollection routes) {
routes.IgnoreRoute("{resource}.axd/{*pathInfo}");
routes.MapRoute(name: “Default”,
url: “{controller}/{action}/{id}”,defaults: new { controller = “Home”, action = “Index”, id = UrlParameter.Optional }
);
}
You can see that when you run your application, you are taken to the Home View Index.cshtml file located in the ViewsHome folder. This is achieved by the above code. It is setting your default View that you will go to if you have not explicitly changed the URL to request any other view.
Let’s change our default View to take us to the Movies View rather than the Home View. Replace the default controller property from Home to Movies in the RegisterRoutes Method Default route.MapRoute statement like below.
public static void RegisterRoutes(RouteCollection routes)
{
routes.IgnoreRoute("{resource}.axd/{*pathInfo}");
routes.MapRoute(
name: “Default”,
url: “{controller}/{action}/{id}”,
defaults: new { controller = “Movies”, action = “Index”, id = UrlParameter.Optional }
);
}
Now if you run your application, then you will be directed towards the Index file in the ViewsMovies, but you will receive an error. That is because we still have not yet added the Index view in our ViewsMovies. So let’s add that now.
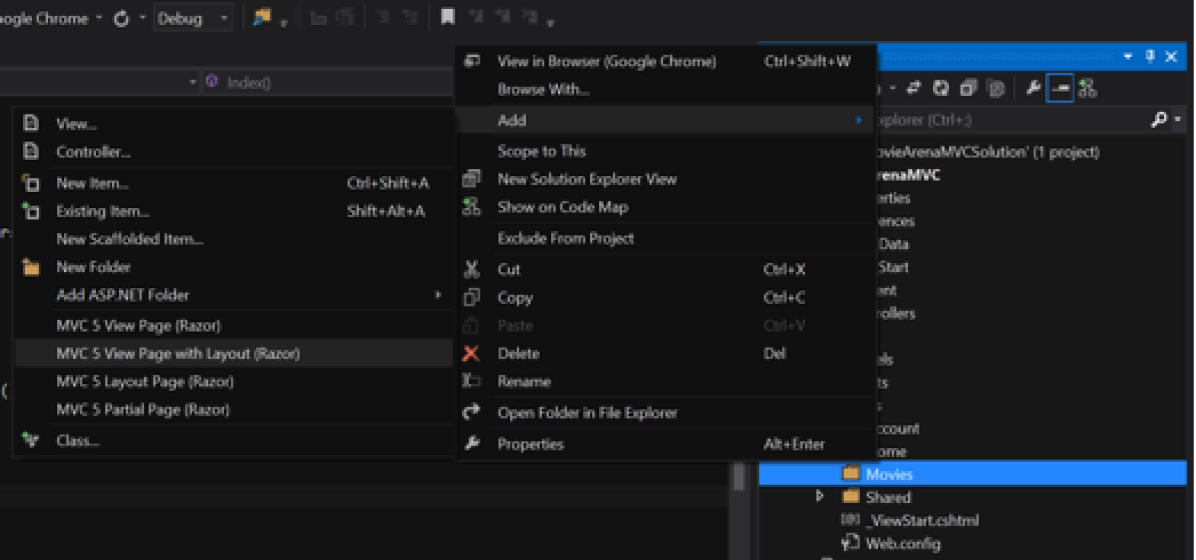
Right click the ViewsMovies folder and click Add, then click MVC 5 View Page with (Layout Razor).
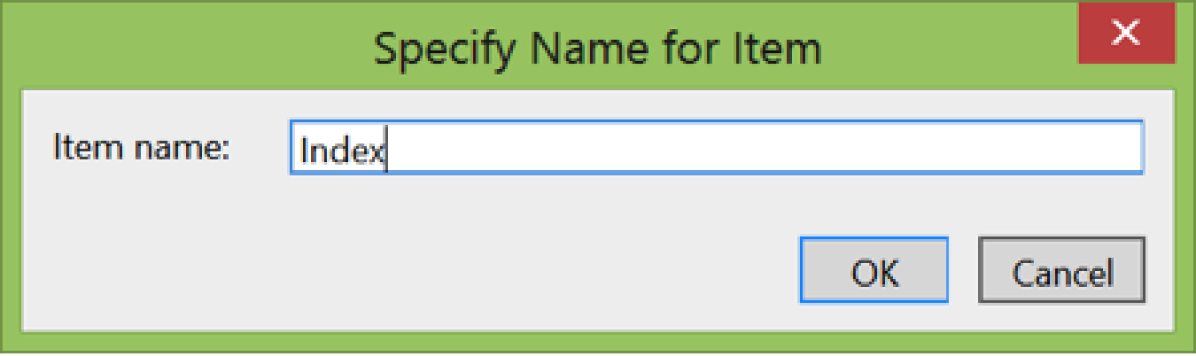
Name it “Index” and Click OK.
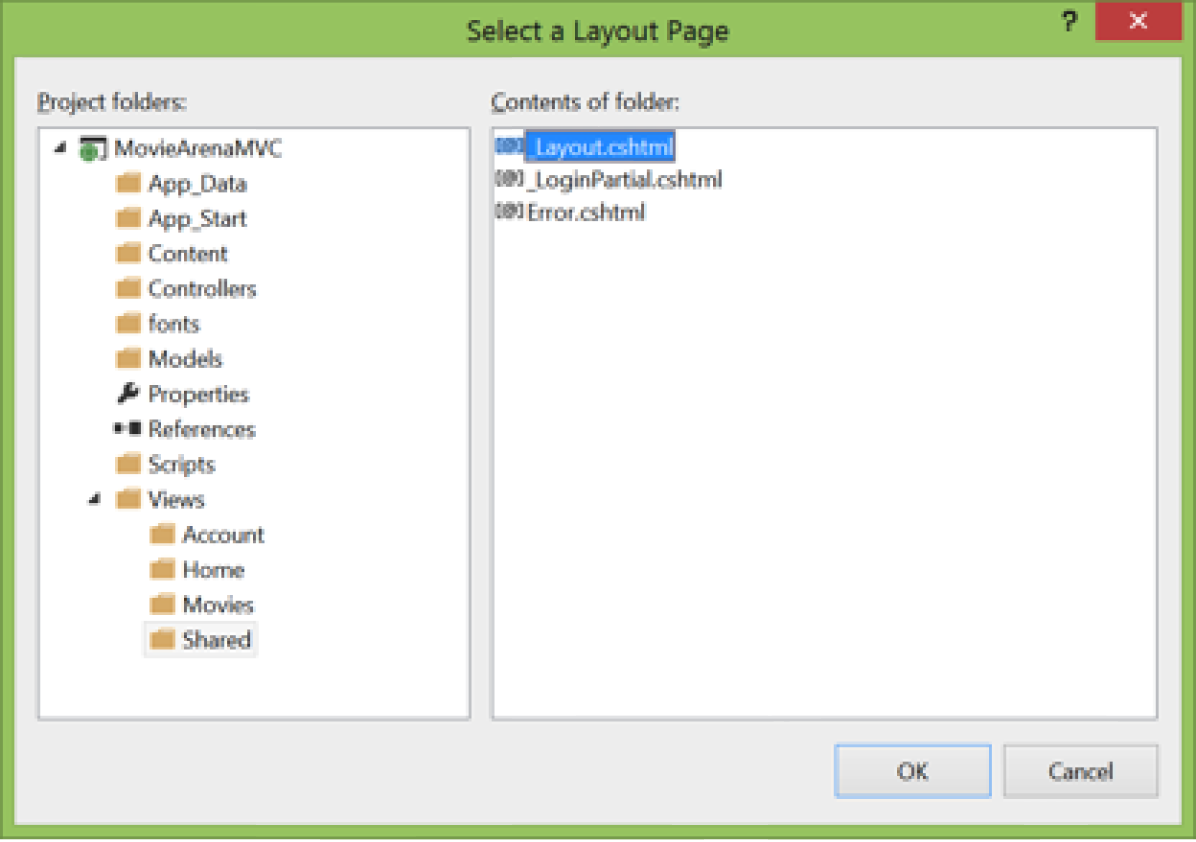
In the Select a Layout Page box, accept the default _Layout.cshtml and click OK.
You will see that a file named Index.cshtml has been added in the ViewsMovies Folder. The _Layout.cshtml that we selected actually holds the common design of the web application that we want the assigned views to use. Before we move on, let’s change some basic designs and text that our web application should be displaying in our views as well as set some common navigation links.
First, you want to change the “Application name” link at the top of the page. Go to the Views/Shared folder in Solution Explorer and open the _Layout.cshtml file.
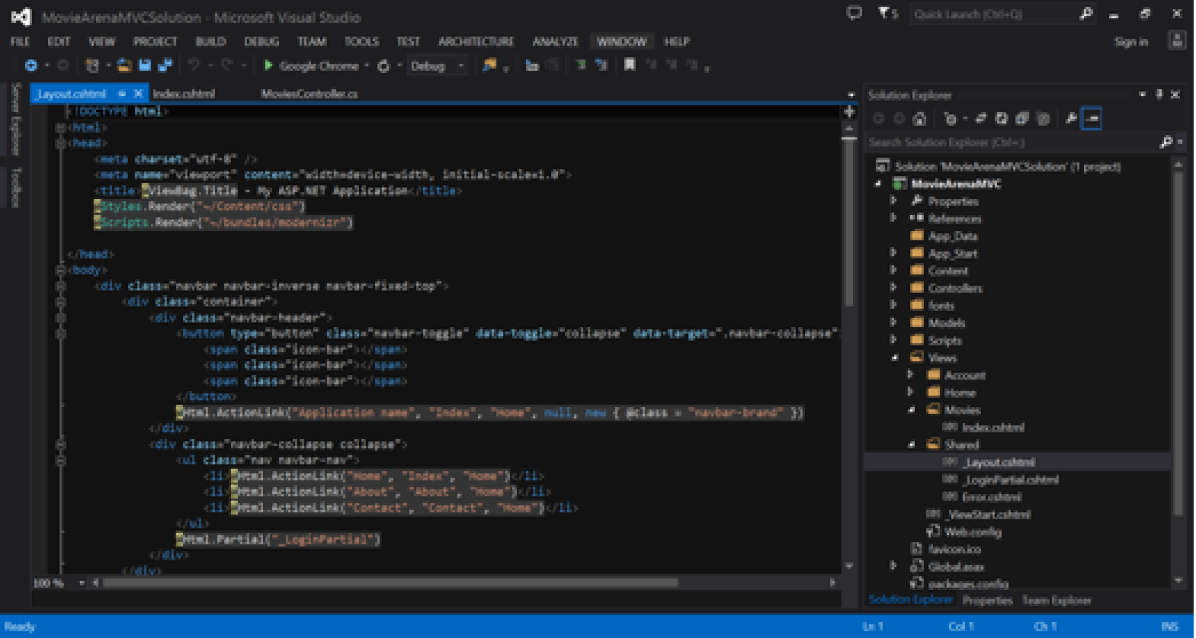
Replace the text in the <title> and <footer> element from “My ASP.NET Application” to “MovieArena”. Change the ActionLink in the layout template from “Application name” to “MovieArena” and the controller from Home to Movies. Also, change the controller in the <ul> navigation menu that is showing the main navigation link from Home to Movies. Your code should look something like what is shown below after the changes.
@Styles.Render("~/Content/css")
@Scripts.Render("~/bundles/modernizr")
@Html.ActionLink(“MovieArena”, “Index”, “Movies”, null, new { @class = “navbar-brand” })
@RenderBody()
© @DateTime.Now.Year – MovieArena
@Scripts.Render("~/bundles/jquery") @Scripts.Render("~/bundles/bootstrap") @RenderSection("scripts", required: false)
Our newly created view template, i.e. Index.cshtml, has the initial razor code in it that sets the common layout of the view to use the _layout.cshtml file located in ViewsShared.
@{
Layout = "~/Views/Shared/_Layout.cshtml";
}
This will link this layout file to the view template we created or any other view template in which we put it. In addition to assigning layout templates separately in each view template, we can also assign a default layout for all the templates contained in the Views folder. If you look in that folder you may find a file named _ViewStart.cshtml which actually contains the same code as above. So even if you remove this code from the Index.cshtml view template file, this generic template will make sure that all the view files in this folder have the layout defined within it. So let’s just remove our layout code from the Index.cshtml file.
So now if you build and run the application you will see all the changes that we made, like the change of Application Name and the title and footer changes. The Home link now redirects us to the Movies Index page also. MVC does this by merging the layout file with your view template index file as set in the code.
Let’s put some text into our view template to see if we can get a secondary heading in there along with a message.
Open the ViewsMoviesIndex.cshtml and put the following code in it.
@{
ViewBag.Title = "Movie List";
}
Latest Movie List
I will display my movie list here!
Build and run the application to see what we actually did.
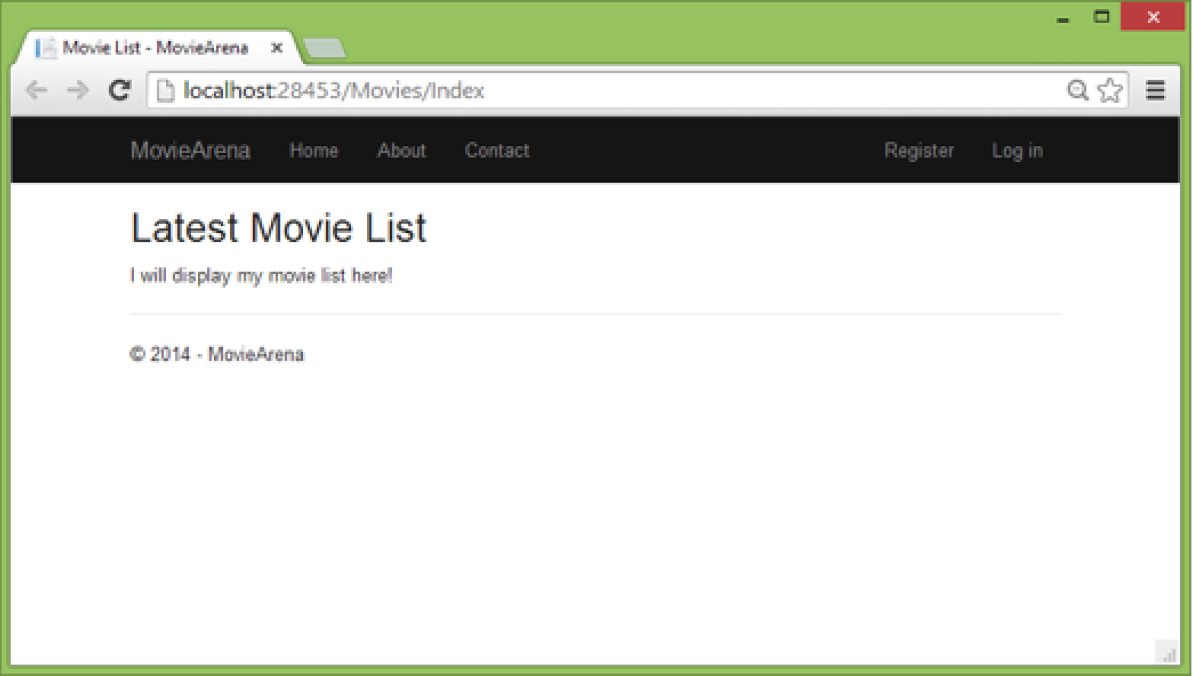
So what we did is put a secondary heading in our template, along with some text to display on our Index page. Also if you notice the title in the browser window, you will notice that it changed from “- MovieArena” to “Movie List – Movie Arena”. We did this by setting the ViewBag. Title property which we can see is being put in the _Layout.cshtml template in the <title> tag.
This property is then replaced with the value that we assign from within our Index.cshtml view as below. Then ASP.NET MVC merges them and renders the UI back to the browser to display.
@{
ViewBag.Title = "Movie List";
}
With this ViewBag approach, you can easily manage any number of parameters between your view template and your layout file.
Now we have our controller to handle business logic and return a view template, and our view. So now we will need a Model to interact with our movies database and get us the list of movies, and perform insert, update and delete operations as well.
Before we go to our database and work on our model, though, let’s first talk about passing information from the controller to a view. Controller classes are invoked in response to an incoming URL request. A controller class is where you write the code that handles the incoming browser requests, retrieves data from a database, and ultimately decides what type of response to send back to the browser. View templates can then be used from a controller to generate and format an HTML response to the browser. Controllers are responsible for providing whatever data or objects are required in order for a view template to render a response to the browser. One good practice is that a view template should never perform business logic or interact with a database directly. So a view should only be working with the data provided by the controller. This division helps keep your code clean, testable and easily maintainable.
You can put parameters in the controller methods that can be passed to the view being returned. These parameters are passed through the URL, i.e. using query string to the controller when it requests for a page. This is achieved by assigning these values to the ViewBag object properties that you can then use in your view template.
Add the following method to MoviesController.cs right under the Index method:
//
// GET: /Movies/Details/5
public ActionResult Details(int ID = -1)
{
ViewBag.MovieID = ID;
return View();
}
As you can see, we have put a parameter in the method that we are then passing to the ViewBag object so that the returned View can use it.
Now we need a new view template to map to the method we just added in our Movies controller.
As before, Right click the ViewsMovies folder and click Add, then click MVC 5 View Page with (Layout Razor).
Name it “Details” and Click OK.In the Select a Layout Page box, accept the default _Layout.cshtml and click OK.
You will now see a Details.cshtml in the ViewsMovies folder that we just created. It will be opened in the IDE
Replace all the code with the following code in the Details.cshtml file.
@{
ViewBag.Title = "Movie Details";
}
Movie Details
There is a request to show details for the Movie ID : @ViewBag.MovieID !
Now we have a method to invoke in the controller that can take a parameter (in our case a movie ID), assign it to the ViewBag.MovieID property we created and return the required view. In the Details.cshtml, for now I have just put a message to display the parameter value that has been passed and changed the secondary header and the title of that page.
Build and run your application. You will be taken to the MoviesIndex page by default as we have defined the route there. To check the Details page out navigate manually to the following URL.
http://localhost:xxxx/Movies/Details?id=4
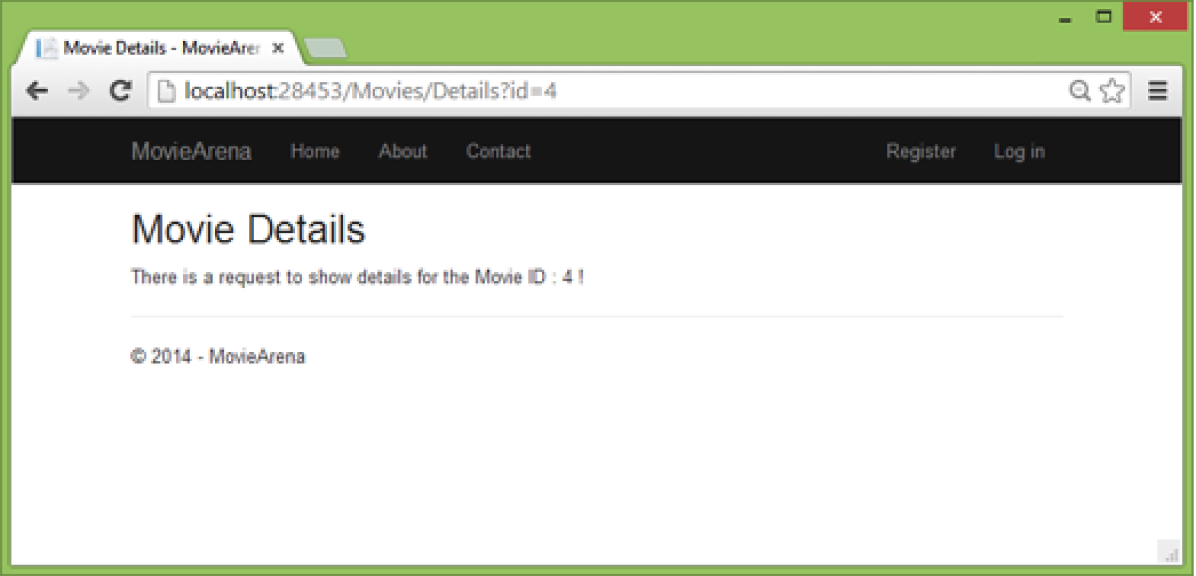
You now see our details page, which takes the ID parameter through the query string and sends it to the controller, which, on the basis of the request, invokes the appropriate method and returns the required view. Our details view shows us a message displaying what we passed through the parameter using query string.
Now let’s move toward our model and database. We will be using a .NET framework data access technology that we know as Entity Framework to work with our model classes. Entity Framework (EF) has a development paradigm support called Code-First. Code-First allows you to create your model classes using ordinary classes. Also known as POCO (plain old CLR object) classes, these help you create the database on the fly from your defined classes, which enables a very clean and rapid development workflow. There is also a database first approach, which I will be using as we already have a MovieArenaDB that we created in my last blog on ASP.NET Web Forms. Please visit my last blog on ASP.NET Web Forms to help create the database again if you don’t have it. Below is the link to my blog.
We will use the database first approach that will actually use our existing database and create our model classes or entities from it.
Before I go ahead, I want you to know that I have EF in my list of blogs in this series and will be explaining it in detail. For now, just to keep it short, I will just go through the setup process of Model using the EF database first approach.
Open the Server Explorer pane in Visual Studio by clicking the View menu and clicking Server Explorer.
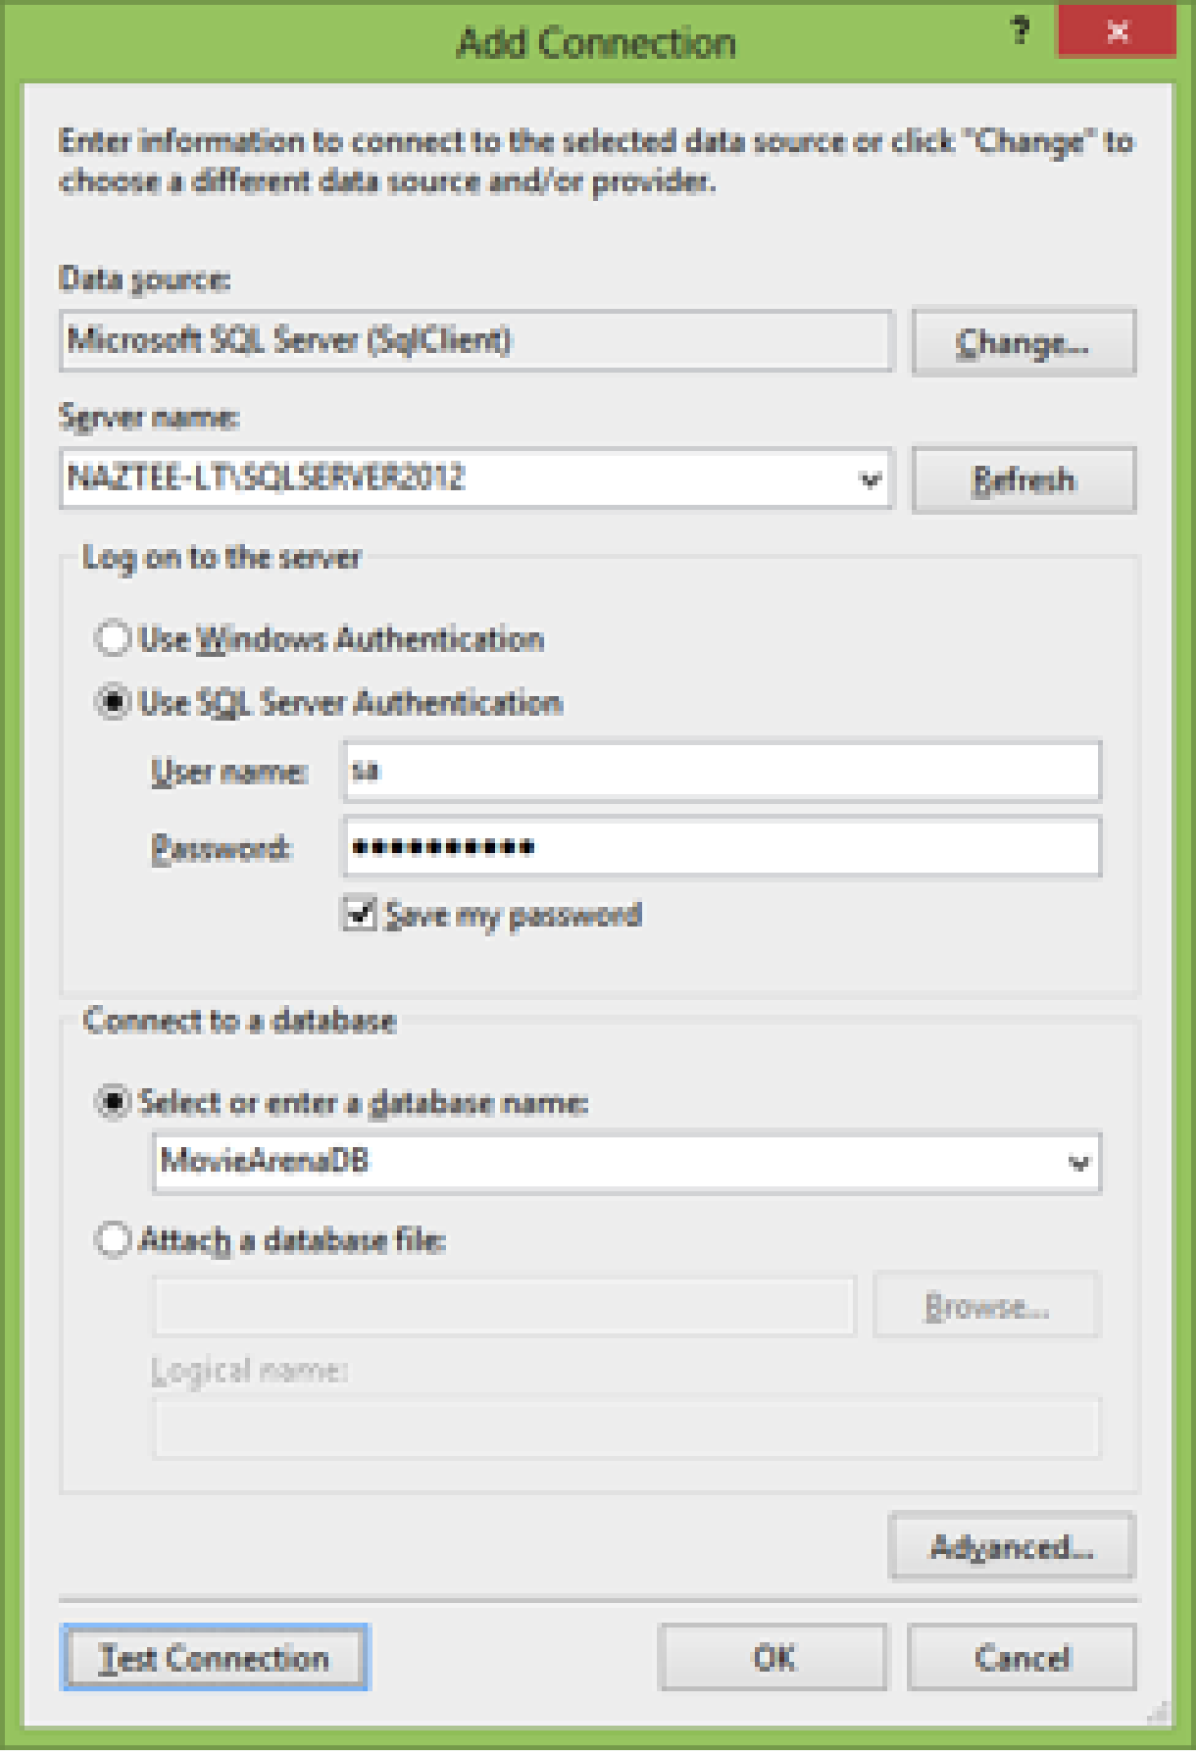
Let’s add our connection to the already set up database in our SQL Server 2012. In the Server Explorer pane, right-click the Data Connections and click Add Connection. Select Microsoft SQL Server from the list in the next dialogue box and click OK.
In the next dialogue box, enter your server name, select the type of authentication you use and enter the credentials if SQL Server Authentication is selected. Then select the database from the server that is listed automatically if all the connection information is correct. In our case we will select the “MovieArenaDB”.
Now that we have our connection setup, lets create our EF model classes from the database tables. These model classes are known commonly as entities that will be interacting with our data in the database. Each model represents a table in the database and contains properties that relate to the columns within.
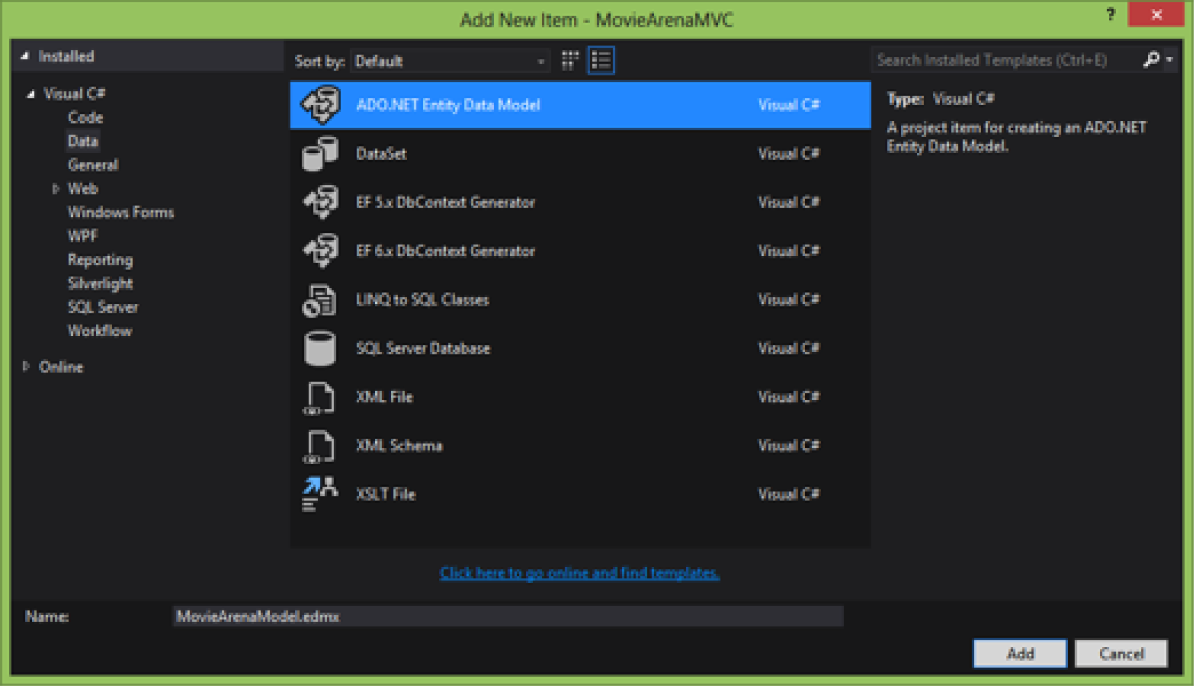
Right-click the Models folder, select Add and then New Item.
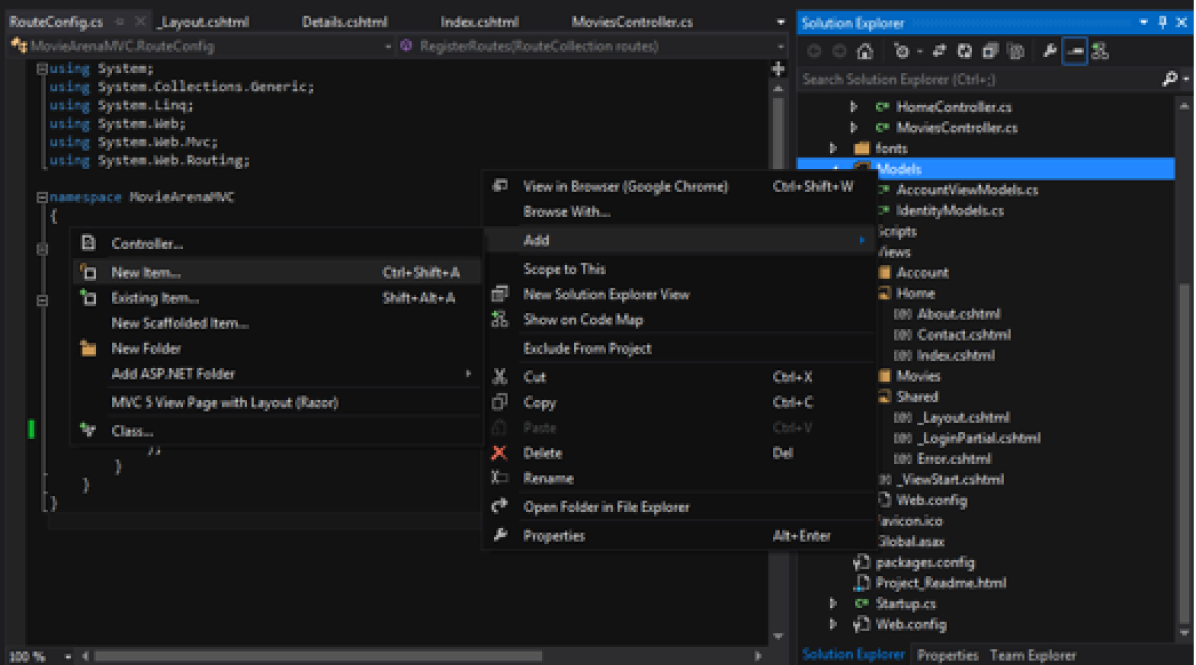
In the Add New Item window, select Data in the left pane and ADO.NET Entity Data Model from the options in the center pane. Name the new model file “MovieArenaModel.edmx”.
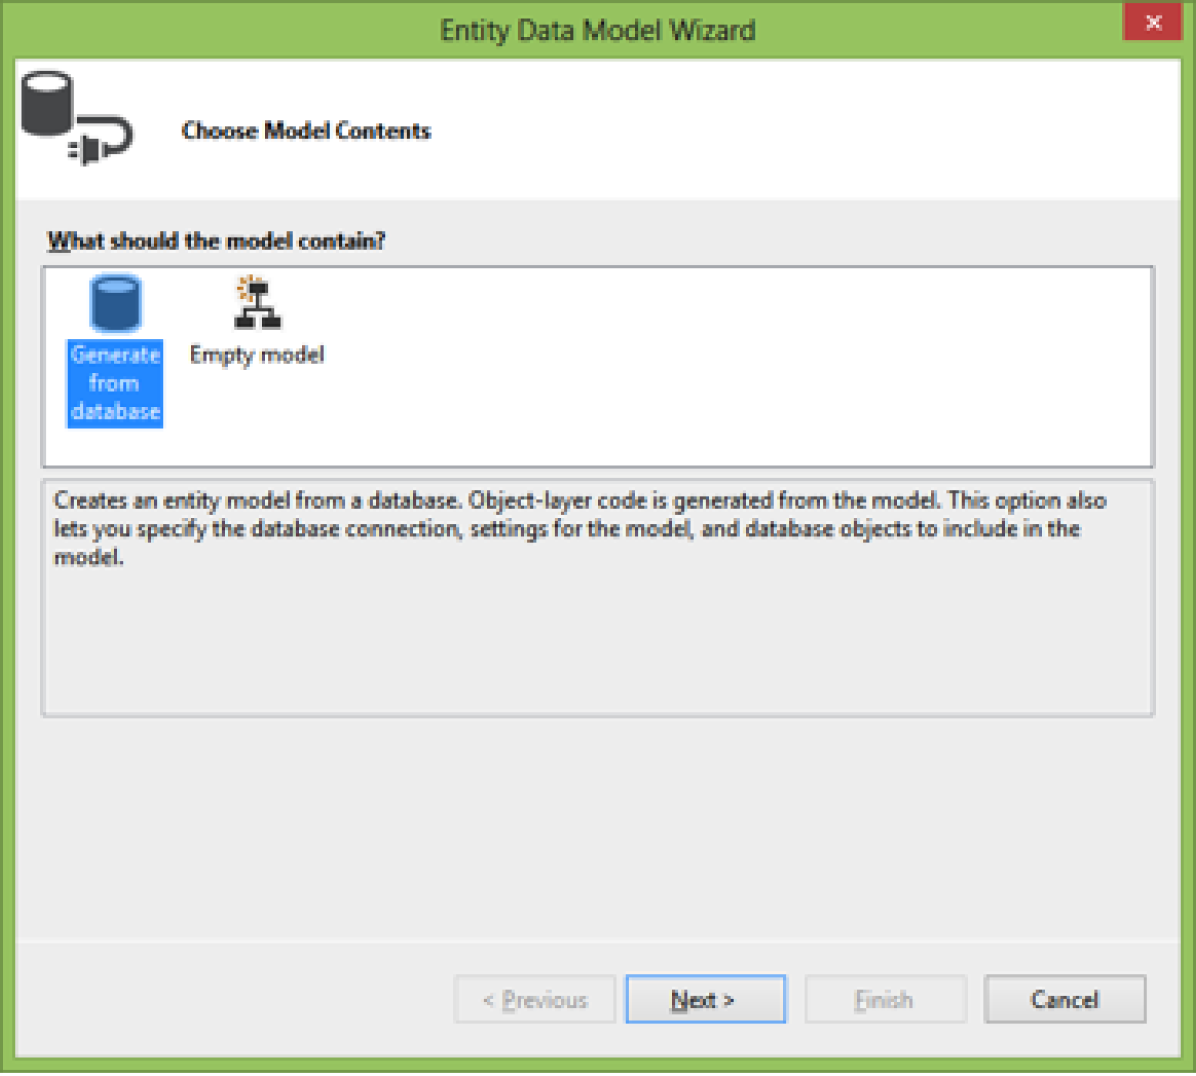
In the Entity Data Model wizard that opens up next, select Generate from database and click Next.
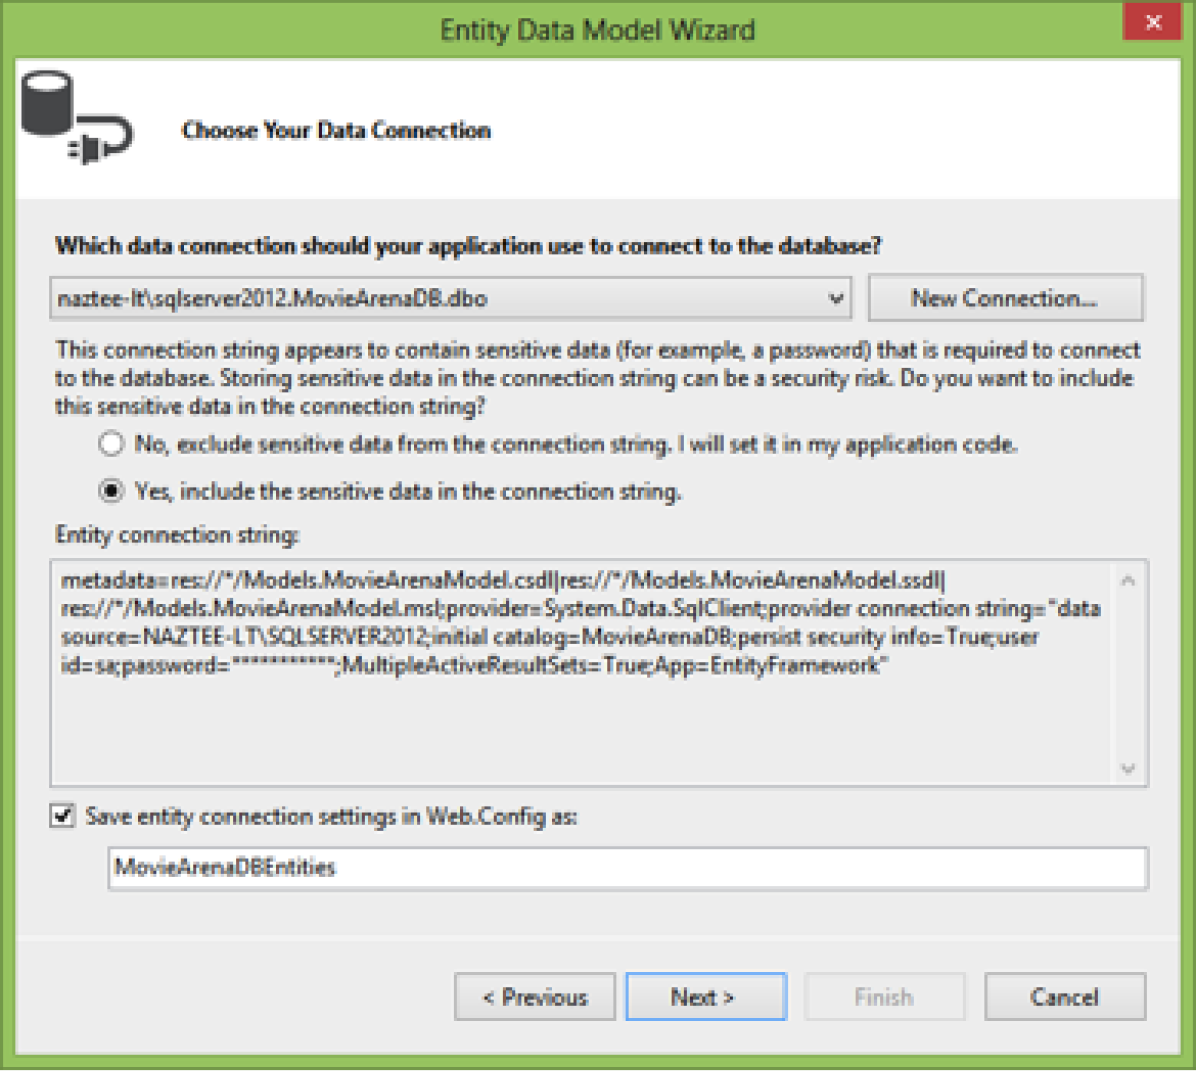
In the next wizard pane, select the connection that we just created in our Server Explorer panel from the dropdown. Select if you want to add the password in your connection string or not. Check the “Save entity connection settings in Web.Config as” box and set the name of it to “ModelArenaDBEntities”. Click Next.
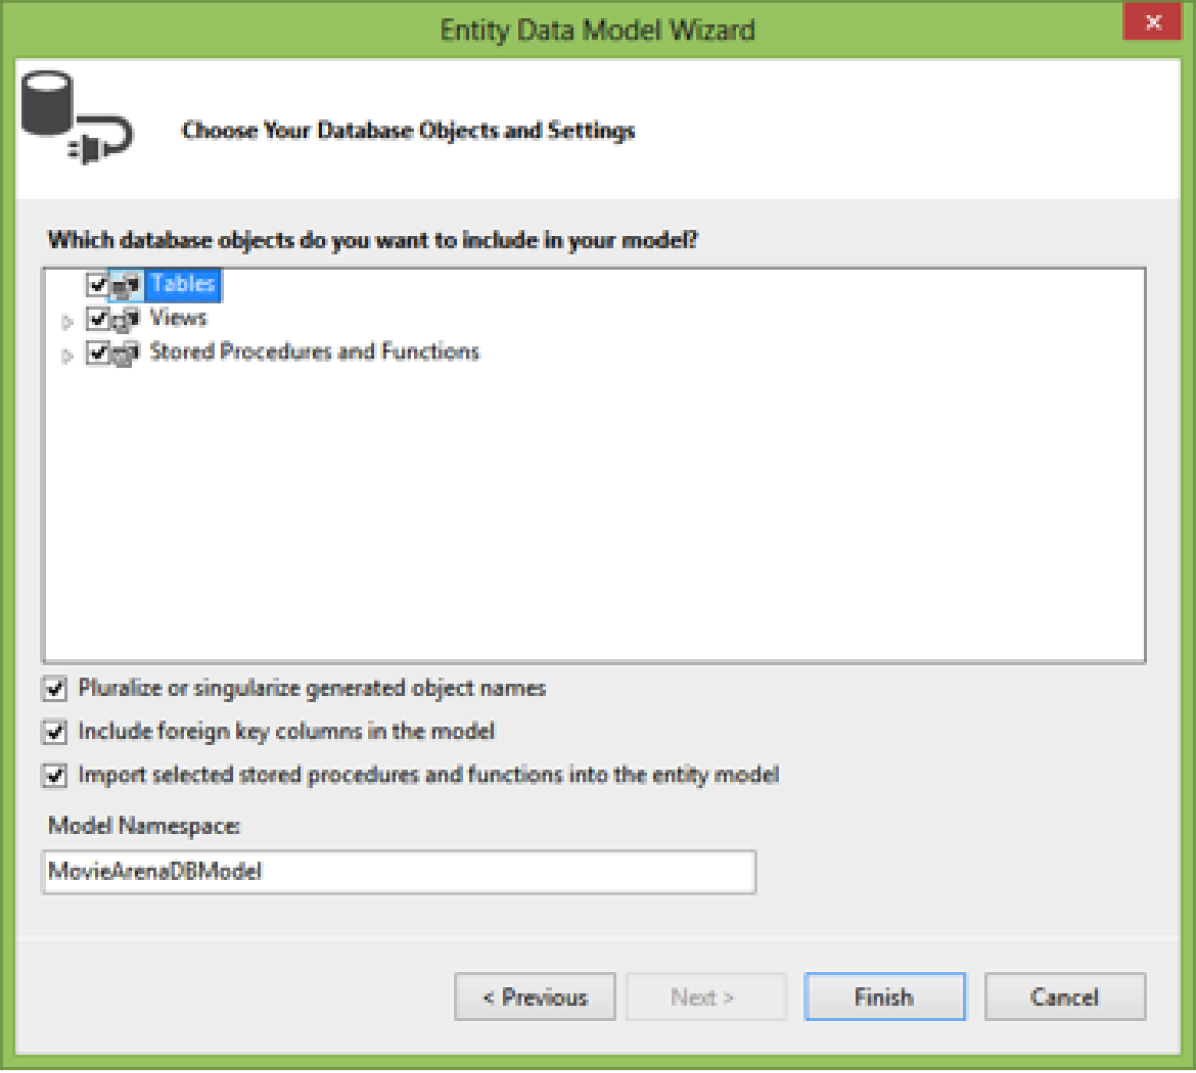
In the next wizard pane, select the database objects you want to add in your mode,l i.e. Tables, View and Stored Procedures & Functions. Set the Model Namespace to “MovieArenaDBModel” and then click Finish.
Now let Visual Studio do its thing and you will see that it added a MovieArenaModel.edmx in our Models folder and also opened the design view of this .edmx file. If you expand the edmx file in our Models folder, you will notice that it contains some files. I will be explaining more on what these files are in my EF blog in the future but for now the file I want you to expand and look at in the MovieArenaModel.Context.tt is the MovieArenaModel.Context.cs file. This file contains a class that derives from the DbContext class, and provides a property for each model class that corresponds to a database table. You will see that it contains the class Movie (Entity) representing our main Movies table that it got from the database and what we will mainly be using. Each instance that we create of this Movie class will represent a single row in the Movies table.

You should build your project, because moving on without building will result in error.
Now that we have our Model setup, let’s use it by creating a new controller so that we can pass the data from the database using the model to our view templates in the ViewsMovies folder.
First we will need to delete our already created MoviesController.cs file as well as the ViewsMovies folder. We need to do this so that we can create a new controller with the same name, but this time it will be set up using the EF model.
Note that I could add all the files and do all the settings in the current MoviesController.cs file and the View files for the Movies to make it use the EF model, but that will make this blog a lot lengthier and I really want to show you the power of Visual Studio IDE as well as templates cause they shrink that time to almost one fourth the time taken in a manual setup.
Right-click the MoviesController.cs file and click Delete. Do the same with the ViewsMovies Folder. Now Right-click the Controllers Folder, click Add and then Controller.
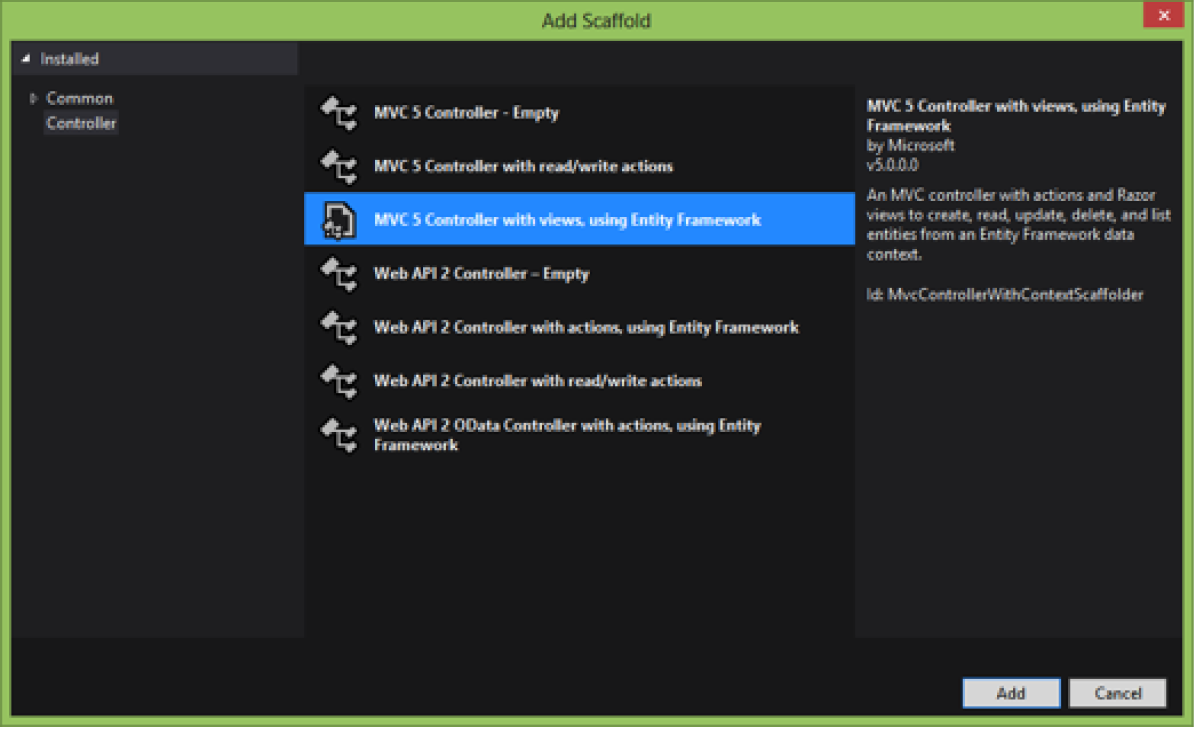
In the dialogue box, click MVC 5 Controller with views, using Entity Framework, and then click Add.
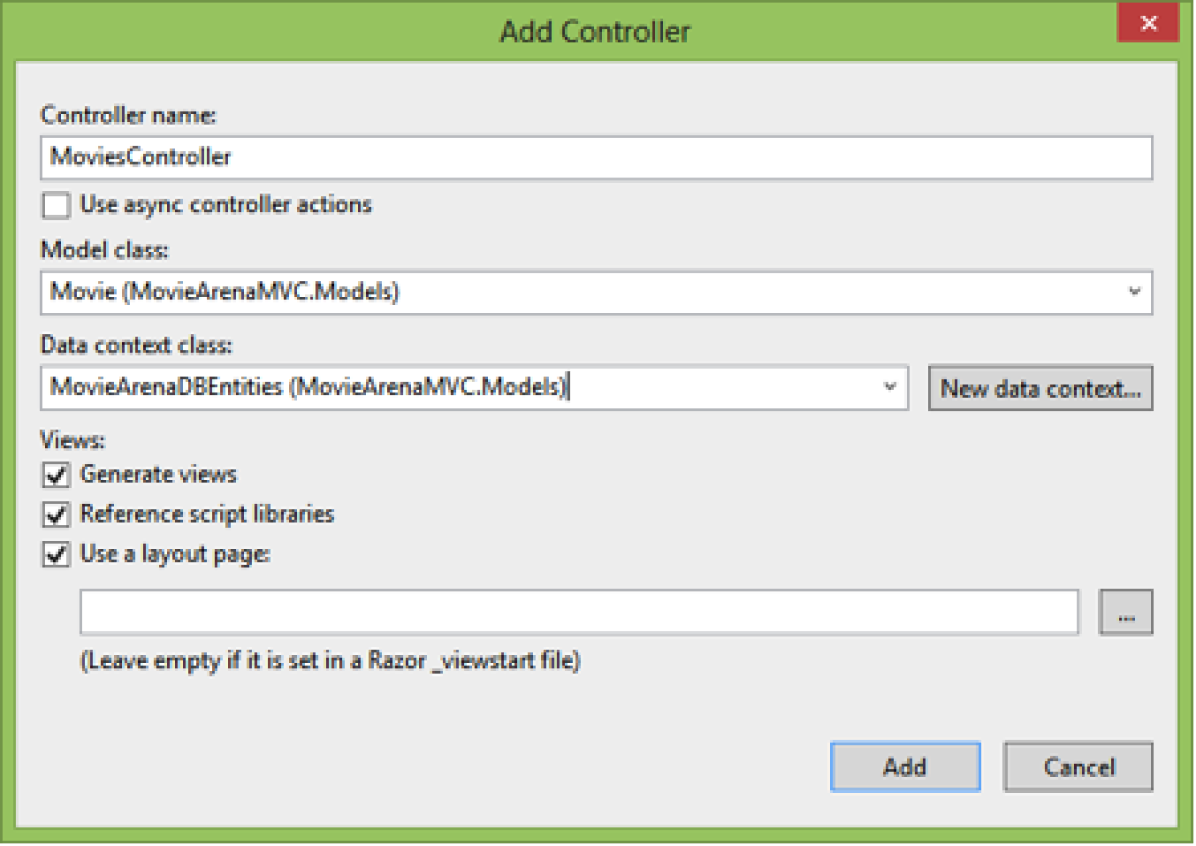
In the next window, For the Controller name enter MoviesController.
Select Movie (MovieArenaMVC.Models) for the Model class.
Select MovieArenaDBEntities (MovieArenaMVC.Models) for the Data context class.
Click Add.
Visual Studio creates the following files and folders:
• A MoviesController.cs file in the Controllers folder.
• A ViewsMovies folder.
• Create.cshtml, Delete.cshtml, Details.cshtml, Edit.cshtml, and Index.cshtml in the new ViewsMovies folder.
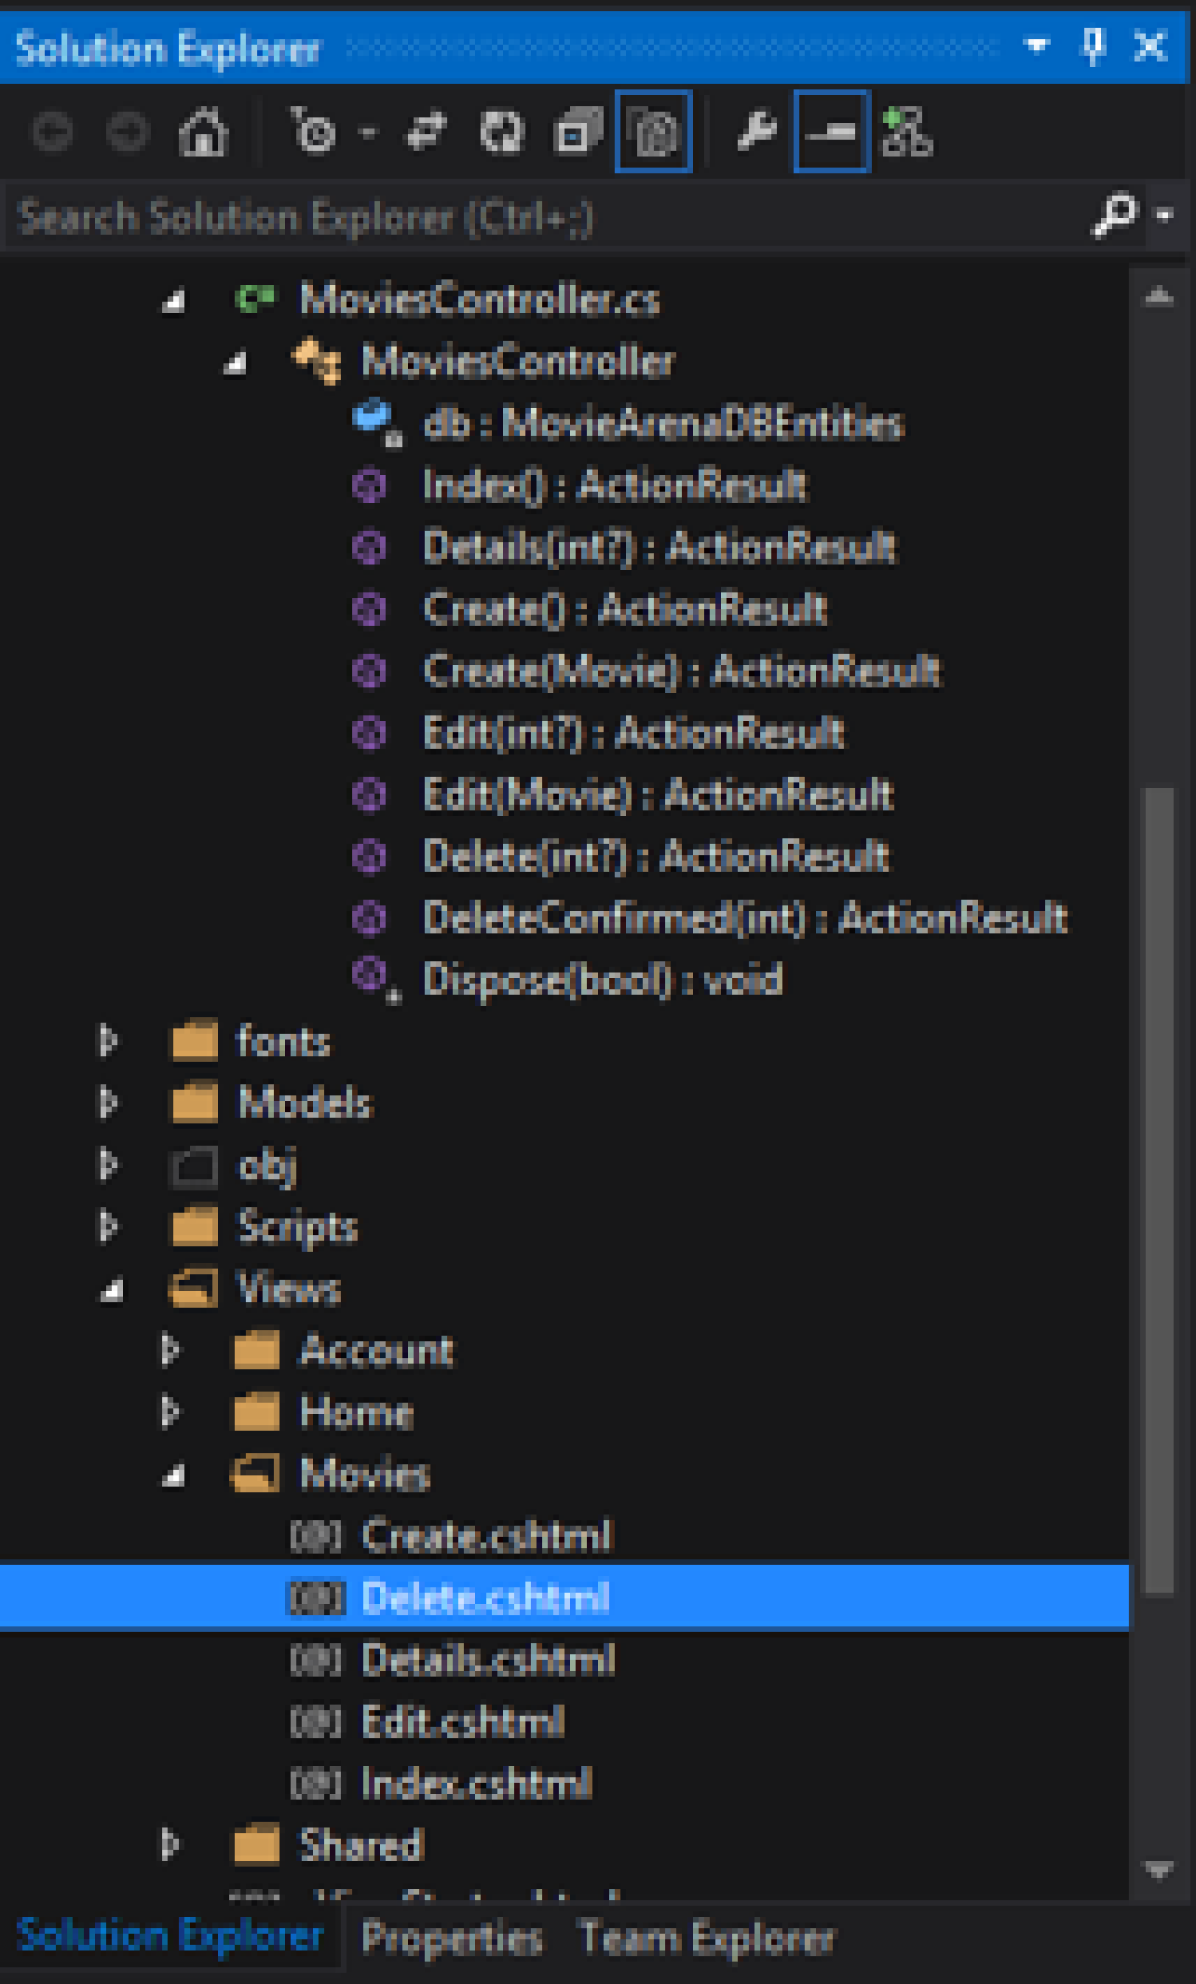
As you can see, Visual Studio automatically created your Movie CRUD (create, read, update and delete) action methods in the MoviesController.cs file and also created all their related views in the ViewsMovies Folder. This automation of creation of CRUD view files and action methods is known as scaffolding.
An important aspect to look at in our .cshtml files is that all of them have a “@model” at the top. This actually explicitly tells the view what type of object it should expect. The object is basically passed from the MoviesController to the view so that it can access the data it requires to display. These views, which include the “@model” at the top, are known as Strongly-Typed Views and are the preferred and secure way data from the model should be passed to the view through the controller.
Also in the controller MoviesController.cs, you will notice [HttpPost] on specific methods. All the methods that create, edit, delete, or otherwise modify data need to use this attribute for security purposes. There is also a [HttpGet] attribute, but that is implicitly assigned to the specific methods that only retrieve data like our Index and Details methods. In our case, all the [HttpGet] methods follow a similar pattern. They get a movie object (or list of objects, in the case of Index), and pass the model to the view. Modifying data in a [HttpGet] method is a security risk, so don’t do it.
So now you have a web application that allows you to create, list, edit and delete movies.
Before we run the application, we need to update our title and secondary title heading for each of the view files we created like before. We do this because these files, i.e. the .cshtml files in the ViewsMovies folder, were created from scratch and have the default template values in them.
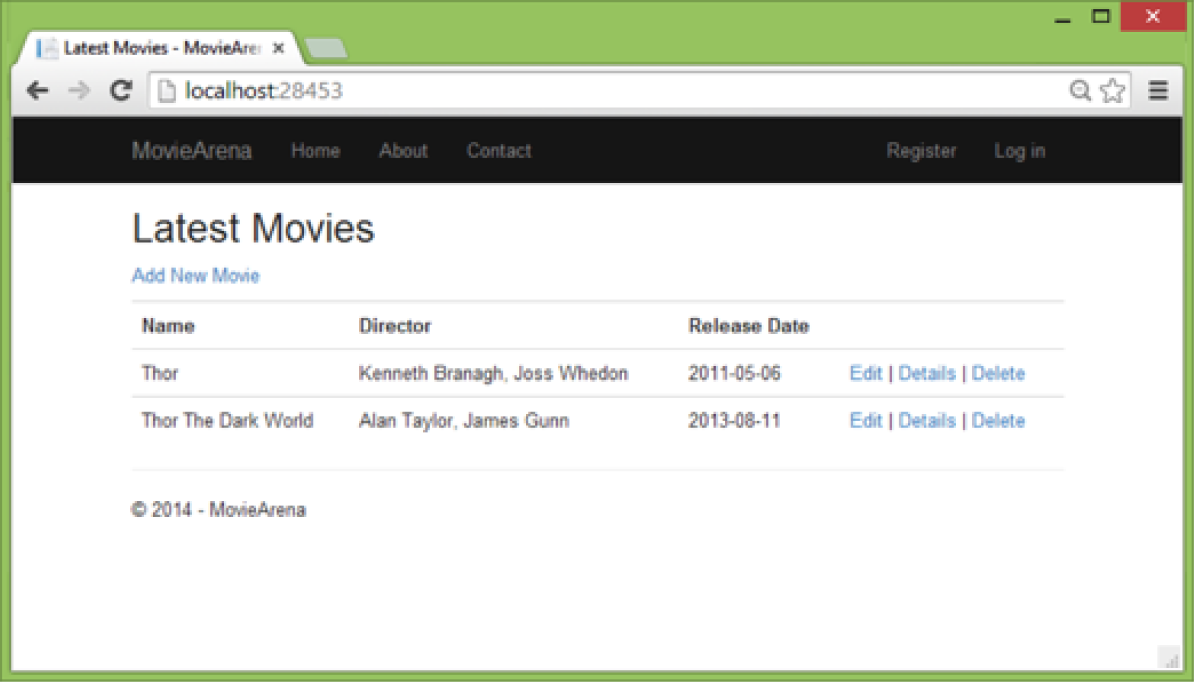
Now let’s build and run our web application and see MovieArena in action.
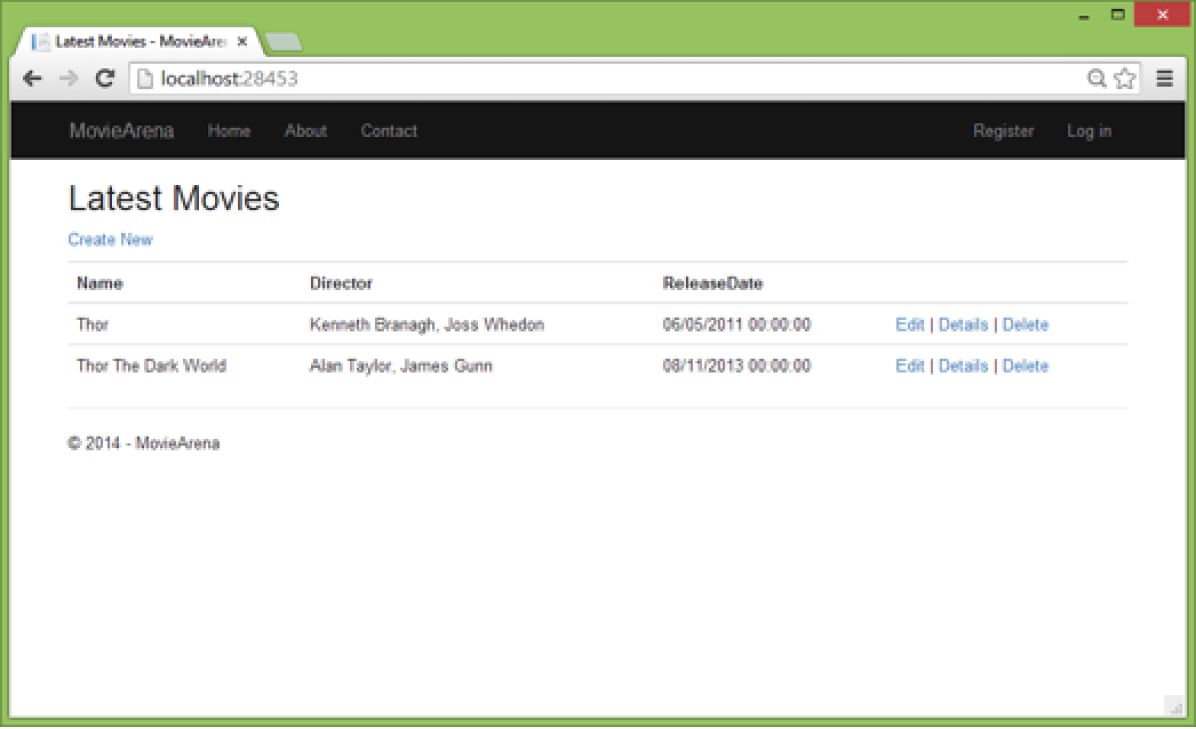
By the looks of it we have successfully creatd our web application that lets us add, edit, list and delete movies, but I would like to do some changes that will help make this web application more user-friendly.
First: Let’s change the ViewBag.Title = “xxxxxx” and the <h2> tag text and also remove the extra heading tag of <h4>Movie</h4> to fit the design according to our needs as follows.
Index.cshtml = “Latest Movies”Details.cshtml = “Movie Details”Create.cshtml = “Add Movie“Edit.cshtml = “Edit Movie“Delete.cshtml = “Delete Movie“
Second: Remove the <h4>Movie</h4> line from all of the above pages you find it in.
Third: I updated the following line in the Index.cshtml file.
@Html.ActionLink(“Create New”, “Create”)
To
@Html.ActionLink(“Add New Movie”, “Create”)
With that done, let’s format our data’s display to make its meaning more clear to the user.
Let’s format some labels and data format in our pages.
Now if you look at the list of movies, we see that the header of our third column, the ReleaseDate, is showing without a space in between the 2 words. So I am going to change it so that it displays in a correct manner. For this we will be using DataAnnotations (I will be explaining more on this in my EF blog) in our Model Movie class or entity. In short, DataAnnotations are attributed classes that are used to define metadata for ASP.NET MVC and ASP.NET data controls.
Open the Movie.cs file, which you will find if you expand the ModelsMovieArenaModel.edmx -> then expand the file MovieArenaModel.tt.
To apply formatting on our ReleaseDate property’s display label, first we will add a reference to the DataAnnotations namespace. Add “using System.ComponentModel.DataAnnotations;” at the top of the Movie.cs file with the other “using” statements. Next add the following DataAnnotation attribute classes right above the ReleaseDate property defined in the class.
using System;
using System.Collections.Generic;
using System.ComponentModel.DataAnnotations;
public partial class Movie
{
public int Id { get; set;}
public string Name { get; set; }
public string Director { get; set; }
[Display(Name = “Release Date”)]
[DisplayFormat(DataFormatString = “{0:yyyy-MM-dd}”, ApplyFormatInEditMode = true)]
public Nullable ReleaseDate { get; set; }
}
I added two attributes to the ReleaseDate property in my Movie class. One is named Display and the other is DisplayFormat. Display() in our case sets the property name to be displayed where used and DisplayFormat() handles how the value of that property should be displayed when used. To see the changes, let’s build our web app and look at the List of Movies.
Now you see that our ReleaseDate column header label as well as the date values displayed in that column for each movie has changed to what we defined in our Model Movie class using DataAnnotations attribute classes. Also, these will affect all areas where our Model Movie class is used to display data, i.e. in our Create, Edit and Delete view files as well.
Now we have our web application all set up to list the latest movies, giving us the option to add, edit and delete them as well. We will look briefly at the new authentication system ASP.NET Identity. ASP.NET Identity in a new improved version of the old Membership and Role based security feature. It was developed to support One ASP.NET, which includes all ASP.NET technologies like MVC, Web Forms and Web API, etc. This cross technology support and many other benefits have really offered a simple yet secure way of handling authentication in your web applications.
I will skip over the details and show you how to apply authentication to our web app.
First we need to set the DefaultConnection connection string in our app’s Web.Config file. Open the Web.Config file, and you will see two connection strings in it. One is named DefaultConnection and the other is the MovieArenaDBEntities that was created earlier when we added our model. Go ahead and change the value of the DefaultConnection so that can connect to our MovieArenaDB.
As we saw before when creating our MVC project, Visual Studio 2013 used the bootstrap templates, which added an authentication related controller, model and views automatically and gave us everything that is needed to implement this new ASP.NET Identity authentication. With a few changes in settings, this authentication method also allows us to use external authentication systems (Like Google, Facebook, Twitter, etc.) to easily integrate our app with. Cool, Isn’t it? Now after you have updated the connection string, we just need to update our ControllersAccountController.cs file and replace all “Home” text in the RedirectToAction methods to target our “Movies” Index Page. So replace “Home” with “Movies” in that file and save it.
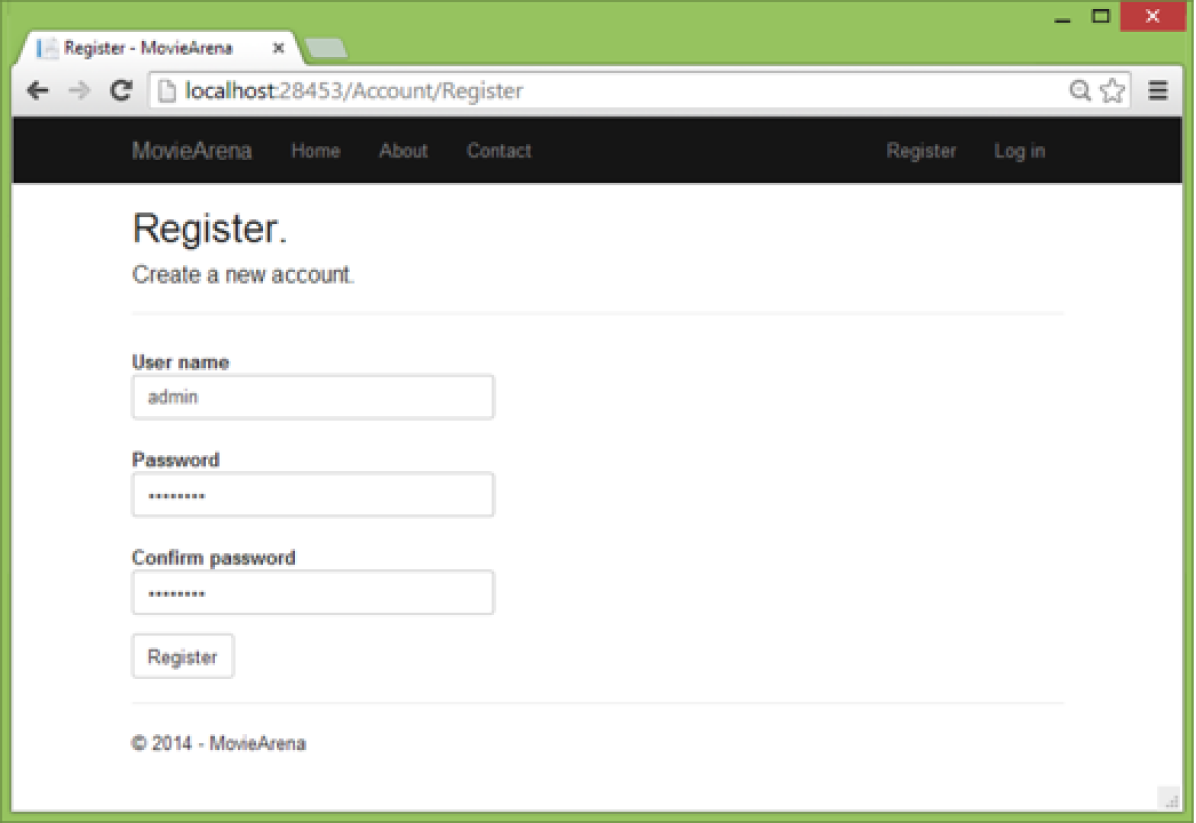
Now build the application and run it, then click the Register link on the top right navigation area that will take you to the Register view. Fill out Username, Password and Confirm Password and hit Register.
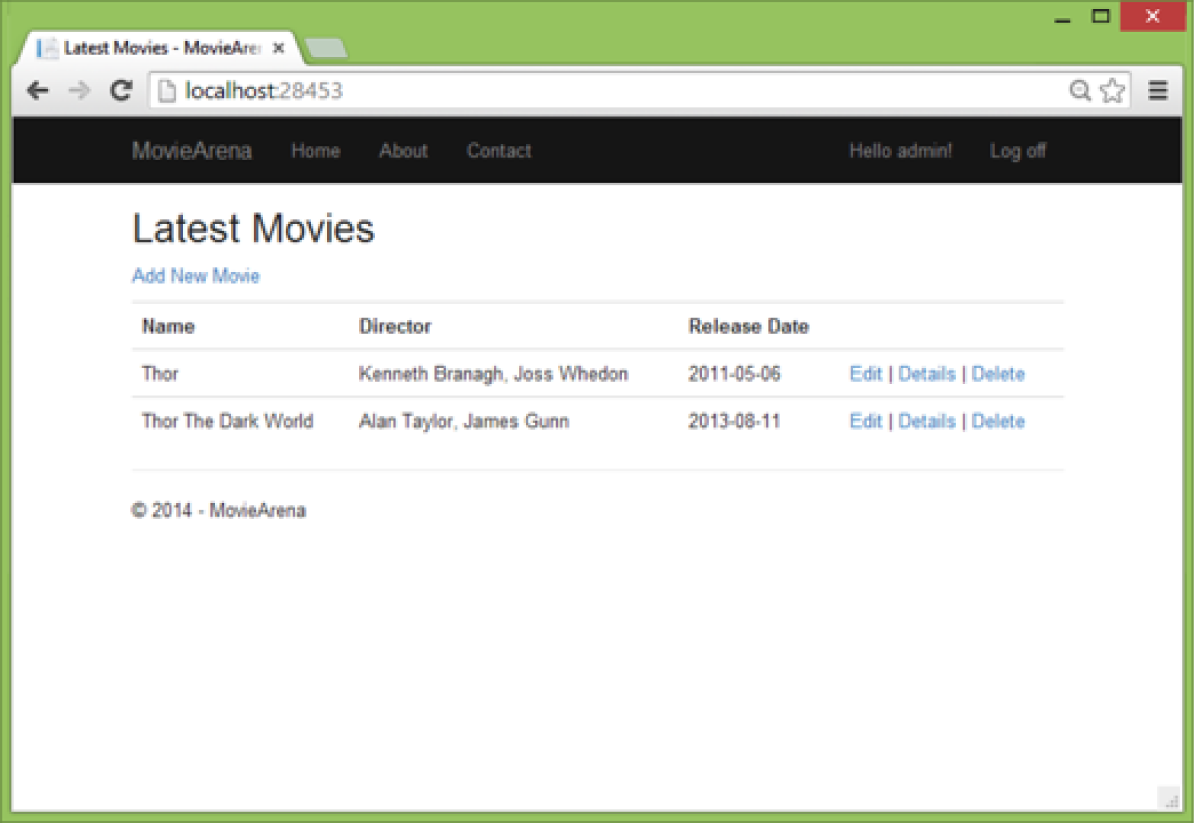
Now right after you clicked Register, you will be taken back to the Movies listings or our Index view in Movies, as we set it in the AccountController class. Also you will notice that you have now logged in with the user credentials that you just registered.
If you notice your database, then you will see a few new tables added with the prefix “ASPNET.” These tables were created using EF’s code-first approach. Visual Studio automatically added all the code and models needed for this process when we created the app with Individual Authentication settings.
Now only one issue remains before we can finish our authentication in this app. The problem is that if you logoff from the account you just created and authenticated with, you will still be able to create, edit and delete a movie record, which we don’t want an unauthorized user to do. Let’s apply our authentication to these methods. For this, we will need to add a [Authorize] attribute to each of these action methods in the MoviesController.cs file. So go ahead and put that attribute on all methods in the MoviesController.cs file except the Index and Details methods.Now if you build and run your application and try to click Add New Movie or click Edit or Delete then you will be taken to the login page if you are not yet logged in. If you are logged in, then you will be able to do all of these operations. Also note that the Index page and the Details page will show data whether you are logged in or not and that is because we did not specify the [Authorize] attribute to their respective methods in the controller.Lastly, let’s hide the links that should not be displayed if the user is not authenticated. To do this, just add all @Html.ActionLink code lines within an @if code block with the following condition.@if (Request.IsAuthenticated) { @Html.ActionLink("Add New Movie", "Create") }After you are done with the above change, build and run your application.You now have successfully created an ASP.NET MVC Application portal that displays the latest Movies and gives an authenticated user the ability to add, edit and delete a movie.

.svg)
.svg)
.svg)
